
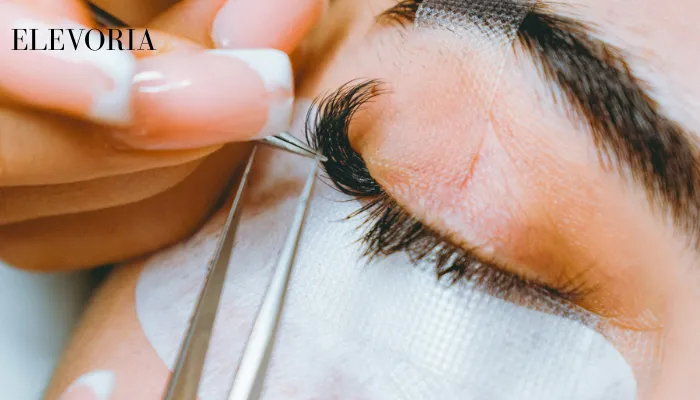
How to Put on Artificial Lashes: Step by Step
Artificial lashes come in three main types: strip lashes, individual or cluster lashes, and magnetic lashes. Strip lashes are the most common for beginners. The basic method is the same: measure and trim the lash, apply a thin line of glue, wait for it to go tacky, then place it as close to your natural lash line as you can.
Know Your Lash Types Before You Start
Strip lashes are a single band of hairs that sit across your whole lash line. They are the quickest to apply once you get the hang of it, and they can be reused a few times if you clean them. Many people find strip lashes the easiest starting point.
Individual or cluster lashes are small groups of hairs that you place one at a time. They give a more natural finish because you can control where the volume goes. The trade-off is that they take longer to apply, especially the first few times.
Magnetic lashes use tiny magnets instead of glue. Some come with a magnetic eyeliner that the lashes cling to, while others sandwich your natural lashes between two magnetic strips. Magnetic lashes are often recommended for people who react to lash glue, though the eyeliner version can still cause irritation for some.
Prep Your Lashes and Tools
Start with clean lashes. Remove any makeup and make sure there is no oil or moisturiser around your eye area. Oil breaks down lash glue and makes the band slide. If you wear contact lenses, put them in after your lashes are on, not before.
Gather what you need: the lashes, lash glue, a small pair of tweezers or a lash applicator, and a small pair of scissors. A mirror you can look down into helps, because you need to see your lash line from above. Some people find a handheld mirror easier than a wall mirror for this.
Measure the lash against your eye before applying any glue. Hold it against your lash line and check where it starts and ends. Trim from the outer edge if it is too long. Never trim from the inner corner, as that is where the shortest hairs are.
Step by Step: Applying Strip Lashes
Apply a thin line of glue along the lash band. Do not use too much, or it will seep onto your natural lashes and feel uncomfortable. Wait around 20 to 30 seconds until the glue becomes tacky. If you apply the lash while the glue is still wet, it will slide around.
Look down into your mirror. Hold the lash in the middle with tweezers or your fingers. Place it in the centre of your lash line first, then press the inner and outer corners down gently. The band should sit right on top of your natural lashes, not on the skin above them.
Press along the band with the tweezers or a clean finger to make sure it is secure. If the corners lift, add a tiny dot of glue to the band and press again. Once the lashes feel stable, you can add a thin line of eyeliner over the band to blend it, if you like. That step is optional.
For individual lashes, the process is similar but slower. Apply a small dot of glue to the base of the cluster, wait a few seconds, then place it at the base of your natural lashes. Work from the outer corner inward if you want a more dramatic effect, or spread them evenly for a subtle look.
Common Mistakes and How to Avoid Them
One of the most common mistakes is applying lashes too far from the lash line. If there is a visible gap, the lashes will look heavy and may lift at the corners. Place the band as close to the base of your natural lashes as you comfortably can.
Another mistake is using too much glue. A thick layer takes longer to become tacky and can ooze onto your eyelids. A thin, even line is enough. If glue gets on your skin, let it dry and peel it off gently with clean fingers rather than rubbing it.
Reusing lashes without cleaning them is also common. Old glue and makeup buildup make the band stiff and harder to apply. Gently peel off the old glue with tweezers and wipe the band with a little micellar water on a cotton bud. Let the lashes dry completely before storing them.
Aftercare, Removal and Safety
At the end of the day, remove strip lashes by gently peeling them from the outer corner. Do not pull them straight off, as this can tug at your natural lashes. If they resist, use a little oil-free makeup remover on a cotton bud along the band to loosen the glue.
Clean your lashes after each wear if you plan to reuse them. Store them in their original tray or a small lash box to keep their shape. Replace strip lashes when they start to look worn or the band loses its shape. They are not meant to last forever.
Do not share false eyelashes or lash glue with anyone. Sharing eye products can spread bacteria and lead to eye infections. The College of Optometrists advises that leftover glue which is not properly removed may also cause an infection, and that lash glue can cause allergic reactions in some people. If your eyes become red, watery, itchy or swollen, remove the lashes and speak to a pharmacist or optometrist.
The DermNet NZ page on false eyelashes notes that some lash glues contain latex, and that acrylate-containing glues have been linked to allergic contact dermatitis. If you have had a reaction to lash glue before, look for a latex-free or acrylate-free option, or consider magnetic lashes instead. Avoid wearing false lashes during an active eye infection such as conjunctivitis or a stye.
This is general educational content, not medical advice, and was not reviewed by a medical professional. Patch test any new product first. Results vary by person, skin type and sensitivity. If you are pregnant, breastfeeding or living with a diagnosed skin, allergy or eye condition, check with a doctor, pharmacist or dermatologist before starting a new active ingredient. See a licensed provider for a persistent, severe or worsening reaction. Avoid sharing eye and lip products, follow storage and period-after-opening guidance, and be careful with counterfeit makeup.
Read More: Urban Decay: Brand Guide and Product Picks



[…] Read More: How to Put on Artificial Lashes: Step by Step […]